


Introduction
JavaScript is widely considered as a language that powers the web which is very crucial in developing a well-behaved website interface and in turn makes it user-friendly and well-responsive to input by users.
If you have been wondering how to apply the fundamental knowledge you have acquired in Javascript from variables, string concatenation, Arrays, Conditional Statements, Elements, Methods and Attribute selectors, then look no further.
In this article, we will be discussing in-depth how you can build a simple and technical dice game by Using HTML, CSS and pure JavaScript.
Pre-requisites
Some Fundamental Knowledge of JavaScript
Code Editor (VS Code- highly recommended)
Basic Knowledge of HTML and CSS
Chrome Browser (To test and visualize our code behavior)
Getting Started with HTML Contents
To reduce our lines of articles, I will be dropping a well prepared HTML content that you are already familiar with to save us some time. You can either copy the code to your text editor and save it inside your index.html file or clone the source code from my GitHub Repository
<html lang="en" dir="ltr">
  <head>
    <meta charset="utf-8">
    <title>Dicee</title>
      <!-- CSS stylesheet -->
    <link rel="stylesheet" href="styles.css">
      <!-- Google fonts -->
    <link href="https://fonts.googleapis.com/css?family=Indie+Flower|Lobster" rel="stylesheet">

  </head>
  <body>
     <div class="container">
          <h1>Refresh Me</h1>
          <div class="dice">
                <p>Player 1</p>
                <img class="img1" src="images/dice6.png">
          </div>
          <div class="dice">
             <p>Player 2</p>
             <img class="img2" src="images/dice6.png">
          </div>
     </div>
  </body>
</html>
Styling HTML Contents using CSS
We have already linked up our styles.css file with index.html file using <link rel="stylesheet" href="styles.css"> which was placed above the <head> tag. To improve the layout of the Dice Game aesthetically, We will use CSS to Style the contents inside index.html that we wrote above.
Our main activity here is to target our container class and set it to center using text-align, giving it a width of 70%. Also, we are going to target our dice class and set it to center using text align and set the display to an inline-block.
Now, we will taget our body and use it to apply a general background-color of #393E46, this will make our code look more attractive.
Lastly, we will target our <h1>, <p> and <img> elements and assign some styles like font-family, text-shadow, color and font size as shown in the code below.
.container {
  width: 70%;
  margin: auto;
  text-align: center;
}

.dice {
  text-align: center;
  display: inline-block;

}

body {
  background-color: #393E46;
}

h1 {
  margin: 30px;
  font-family: 'Lobster', cursive;
  text-shadow: 5px 0 #232931;
  font-size: 8rem;
  color: #4ECCA3;
}

p {
  font-size: 2rem;
  color: #4ECCA3;
  font-family: 'Indie Flower', cursive;
}

img {
  width: 80%;
}
All the code written above are pure CSS code which I believed you are pretty much familiar with and shouldn't be a problem to navigate through it. Applying these CSS styles will make our code appear in the chrome browser as shown below

If you don't want to use these CSS codes, feel free to style your code the way it suits you. This is a fun game-building article that allows your imagination and creativity to take charge.
Setting up our JavaScript file
Now, We will create a new Javascript file called index.js
We will then link our
index.jsfile withindex.htmlfile by inserting<script src="index.js" charset="utf-8"></script>before the closing</body>tag as shown below
       <p>Player 2</p>
         <img class="img2" src="images/dice6.png">
       </div>
    </div>
             <!-- JavaScript stylesheet -->
      <script src="index.js" charset="utf-8"></script>
  </body>
</html>
Creating a Random Number in JavaScript
We are going to create a new variable called randomNum1 inside the index.js file already created. Now, we are going to set the value of this variable to a random number between 1 and 6 using Math.random() function.
var randomNum1 = Math.floor(Math.random() * 6) + 1;
The number that will be generated from the random number generator is going to be between 0 - 0.999. To get a number greater than zero, the variable is increased by 1 and Math.floor() function is used to round it up to a whole number.
Using Document Object Model (DOM), Methods and Arrays
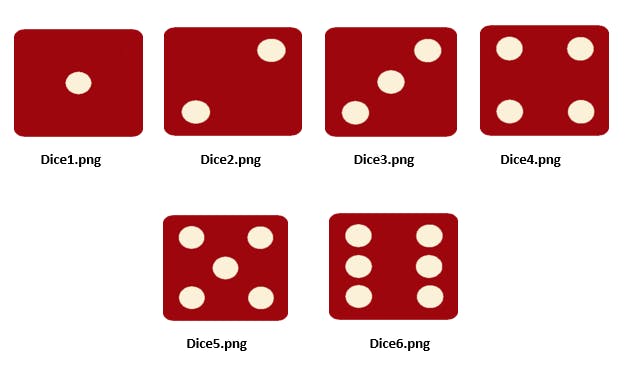
- A random dice Image between dice1.png to dice 6.png which are already saved in the image folders of this project file (as shown above) will be picked by using the
randomNum1we created.
var dice = ["dice1.png", "dice2.png", "dice3.png", "dice4.png", "dice5.png", "dice6.png"];
var randomDice = dice[randomNum1];
var randomImage = "images/" + randomDice;
Now let me explain the code we wrote above;
We created a variable named dice which has a value that is set as an Array. This Array contains strings of items that range from "dice1.png" - "dice6.png" . The items are also known to be in the position [0, 1, 2, 3, 4, 5].
The resulting value of the variable randomNum1 is used to call an item that is corresponding to the position of the random number generated in the array list in which the answer was set to equal another variable which we called randomDice.
Now, the variable randomDice is concatenated with the image folder which is represented in a string ("images/") and we set it to equal another variable called randomImage.
- We are now going to set the result of the variable
randomImage1which is corresponding to a particular image in the image folder to the first<img>element in theindex.htmlfile using thesetAttribute().
document.querySelectorAll("img")[0].setAttribute("src", randomImage);
We used document.querySelectorAll to select all the <img> elements in our index.html file, We then used [0] to select the first <img> element that appears in our index.html file following the principle of Array.
Then, We assigned the new image generated by the randomImage variable using the Method setAttribute("src", randomImage) which contains two arguments.
The "src" in the setAttribute("src", randomImage) method stands for the primary source of all our images which is images/ and the variable randomImage stand for the new image ready to be assigned.
The Syntax for Random Number 2
Furthermore, We are going to repeat the above procedure using randomNum2 and we will assign the final result to the second <img> in the index.html file using the setAttribute().
var randomNum2 = Math.floor(Math.random() * 6) + 1;
var dice = ["dice1.png", "dice2.png", "dice3.png", "dice4.png", "dice5.png", "dice6.png"];
var randomDice = dice[randomNum2];
var randomImage2 = "images/" + randomDice;
document.querySelectorAll("img")[1].setAttribute("src", randomImage2);
Using Conditional Statements.
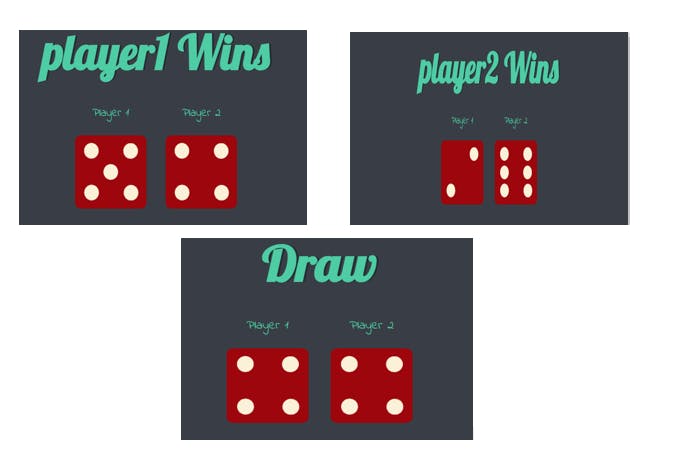
Now, We are going to use a Conditional Statement to change the text inside the<h1> element in our index.html file. If the value of randomNum1 is greater than randomNum2, we are going to use document.querySelector("h1").innerHTML to target and change the text in <h1> to show that player 1 wins.
However, If the value of randomNum2 is greater than randomNum1, We will use document.querySelector("h1").innerHTML to target and change the text in <h1> to show that player 2 wins.
Finally, If the value of randomNum1 is equal to randomNum2, We will also usedocument.querySelector("h1").innerHTML to target and change the text in <h1> to show that it's a draw.
if (randomNum1 > randomNum2){
  document.querySelector("h1").innerHTML = "player1 Wins";
}else if (randomNumb1 < randomNum2){
  document.querySelector("h1").innerHTML = "player2 Wins";
}else if (randomNum1 === randomNum2){
  document.querySelector("h1").innerHTML = "Draw"
}
Conclusion
I bid you a warm congratulation. You have successfully created a Dice game applying the basic knowledge of Javascript you have learned so far from either your Bootcamp, Crash course or Hackathon. I hope you have fun with this game because it will assist you to get a solid grasp of all the things you have learned.
You can also share this wonderful game we have built together with your friends to serve as an inspiration and as well motivate them, who knows it might inspire them with great zeal to start learning how to code.